Welcome to the comprehensive guide grappling with the increasingly popular query: "How to clean vape atomizer." As vaping continues to win hearts and lungs across the globe, the emphasis on maintenance, particularly the cleanliness of vape atomizers, has surged. It's a crucial aspect that bridges the gap between mediocre and exceptional vaping experiences. Let's go through the basics.

What is the lifespan of an atomizer?
When pondering the longevity of an atomizer, it's essential to recognize that its lifespan is not a fixed interval but a dynamic range shaped by several critical factors.
Frequency of Use:
The more frequently you vape, the quicker your atomizer will wear out. Heavy users might find themselves replacing atomizers every few weeks, whereas light users could see theirs lasting several months.
Type of E-Liquid:
The viscosity and sugar content of e-liquid can impact the atomizer's lifespan. Sweet, thick e-liquids prefer to leave more residue, potentially clogging the atomizer faster than thinner, less sweet juices.
Material and Build Quality:
The construction material and overall build quality directly influence its durability. Higher-quality atomizers may have a higher price tag but can offer a longer lifespan.
Rebuildable vs. Disposable:
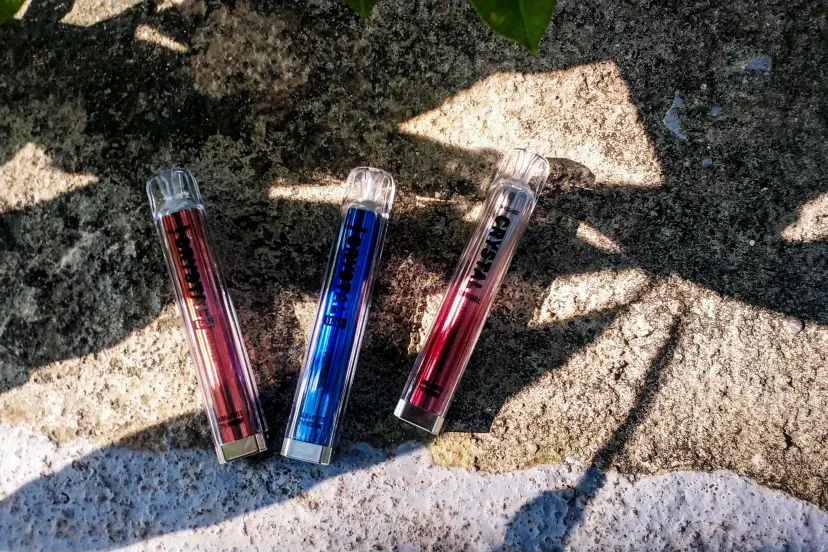
Rebuildable atomizers, which allow for the replacement of coils and wicks, generally last longer than disposable ones like mesh coils in Crystal Bar Vape or SKE Icon Bar, as the core components can be replaceable as needed.
Maintenance and Cleaning:
Diligent cleaning can significantly extend the life of your atomizer. A well-maintained atomizer can outlast a neglected one, emphasizing the importance of regular care.
Generally speaking, an atomizer can serve its purpose effectively for a period ranging from one to three months. This duration leans towards shorter for avid vapers who indulge in frequent sessions.

When should I replace my vape atomizer?
Deciding when to replace your vape atomizer hinges on recognizing certain telltale signs that its performance is waning rather than adhering to a rigid timeline.
Performance Decline
- Decreased Vapor Production: A noticeable drop in the vapor amount could indicate that the atomizer is no longer functioning efficiently.
- Persistent Burnt Taste: If thorough cleaning doesn't remove an enduring burnt flavor or an inability to produce the desired flavor intensity, the atomizer's coil might be exhausted and need replacement.
Physical Condition
- Visible Damage: Cracks in the tank, deformities, or any signs of wear that compromise the integrity of the atomizer call for an immediate replacement.
- Leaking Issues: Consistent leakage not resolved by cleaning or tightening suggests that the atomizer's seals or structure are compromised.
E-Liquid Compatibility
- Changes in E-Liquid: Switching to a thicker or sweeter e-liquid can increase residue buildup, potentially shortening the atomizer's lifespan.
Maintenance Frequency
- Frequent Cleaning Requirement: If your atomizer requires more frequent cleaning than usual to maintain performance, this may be a sign that it's nearing the end of its usable life.
In essence, staying attuned to changes in your vaping experience and the physical condition of the atomizer will guide you in determining the optimal time for a replacement.
Can atomizers be cleaned and reused?
Absolutely, atomizers can be cleaned and reused, which offers a practical approach to prolong their lifespan and ensure the continuity of a premium vaping experience. The cleaning process, while variable depending on the specific design and components of the atomizer, typically involves disassembling the atomizer to meticulously clean each part.

How to clean a vape pen atomizer?
Check a general guide on how to clean most types of vape atomizers. Remember, always refer to the user manual for specific instructions since some materials and components may require special care.
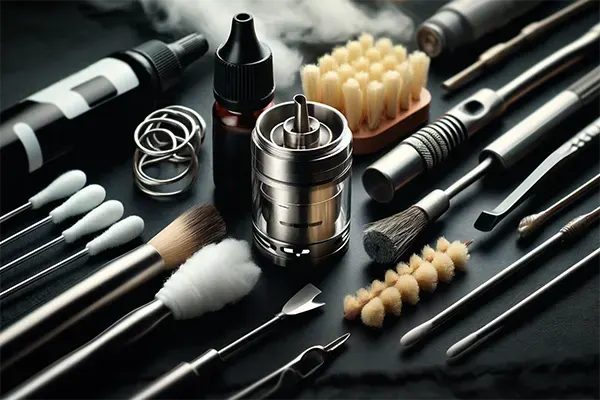
What You'll Need
- Warm water
- Isopropyl alcohol (for deeper cleans)
- A small soft-bristle brush (like a toothbrush) or cotton swabs
- Paper towels or a clean cloth
- A bowl or container (for soaking parts)
Steps for Atomizer Cleaning
1. Start by Disassembling the Atomizer
Carefully take apart your vape pen atomizer. Remove the mouthpiece, tank, and any other removable components. If your atomizer has a removable coil, take it out as well. This step is crucial as it allows direct access to areas most affected by residue buildup.
2. Initial Rinse Under Lukewarm Water
With the atomizer disassembled, gently rinse each component under lukewarm water. This initial rinse helps to loosen and wash away the first layer of residue and e-liquid leftovers.
3. Soak in Isopropyl Alcohol or Warm Water and Baking Soda Solution
For a deeper clean, submerge the atomizer parts in isopropyl alcohol or warm water with baking soda. Allow them to soak for 30 minutes to an hour to break down stubborn grime and buildup. Do not soak any electronic parts like the battery or mod.
4. Gently Scrub the Components
After soaking, use a soft-bristled brush or a cotton swab for careful scrub. Pay special attention to the coil and wicking material, as these areas tend to accumulate the most residue. Scrubbing helps remove any remaining buildup that soaking didn't fully dissolve.
5. Final Rinse and Dry Thoroughly
Subsequently, rinse the components anew with warm water to eliminate any residual debris and cleaning agent. It is imperative to ascertain that all parts are entirely dry before reassembling. While air drying may extend over several hours, this step is crucial to avert any damage to the atomizer that could arise from moisture.
6. Atomizer Reassembly
Once all components are dry, reassemble your vape pen atomizer. Ensure everything is securely in place to avoid potential leaks or functionality issues.
7. Coil Consideration
Should your coil have been cleaned and is deemed reusable, it is imperative to ensure its complete dryness before its subsequent use. In instances where the coil is non-reusable or in a deteriorated state before cleaning, replacement is advisable.

How long should I soak my atomizer?
It's divided into relevant sections for clarity.
Assessing Atomizer Condition
In cases where atomizers exhibit considerable accumulation or have not undergone cleaning for a prolonged duration, a more extended soaking time may be necessary to gradually dissolve persistent residues.
Choosing Your Cleaning Solution
Isopropyl Alcohol: Ideal for a thorough clean, especially for heavy residue. Soak for 30 minutes to an hour for standard cleaning needs.
Warm Water and Baking Soda: A gentler option for regular maintenance. This solution may also require up to an hour of soaking.
Extended Soaking for Stubborn Buildup
In cases of severe grime, extending the soaking time up to a few hours can be beneficial. Keep an eye on the components, particularly when using isopropyl alcohol, to avoid potential damage.
Monitoring and Adjusting
Monitor the cleaning process and adjust the soaking time based on the initial results. This flexible approach allows you to cater to the specific needs of your atomizer, ensuring a clean and efficient vaping experience.

How do I know if my atomizer is flooded?
A flooded atomizer is a common issue faced by vapers, characterized by excess e-liquid within the coil area.
Gurgling Sounds During Use
One of the most apparent signs of a flooded atomizer is a distinct gurgling noise when taking a draw. This sound indicates that e-liquid is obstructing the airflow, causing the liquid to be drawn into the mouthpiece.
Leaking E-Liquid
Leakage from the airflow holes or the base of the tank is another telltale sign. If you notice e-liquid pooling around the base of your device or escaping through the airflow control, it's likely due to flooding.
Reduced Vapor Production
Excess e-liquid within the coil can smother the heating element, significantly reducing the vapor production. If you observe a noticeable decrease in the vapor amount despite regular usage, the atomizer may be flooded.
Spitting E-Liquid
If you experience e-liquid spitting back into your mouth when vaping, this is a clear indicator of flooding. The excess liquid within the coil gets heated too quickly and splatters, which can be unpleasant and disrupt your vaping experience.
Weak or Muted Flavor
Flooding can also dilute the e-liquid's concentration around the coil, leading to a weak or muted flavor. If the taste of your vape seems less intense or flavorful than usual, it could be due to a flooded atomizer.

How to fix a flooded atomizer?
1. Expelling Excess Liquid:
Gently blow through the mouthpiece while holding a paper towel around the atomizer's base to catch expelled e-liquid. This method uses air pressure to push out the excess liquid from the coil chamber and air passages.
2. Adjusting Power Settings:
If your device allows it, increasing the power setting temporarily can help vaporize the excess e-liquid more efficiently. However, be cautious not to exceed your coil's recommended wattage range because this could cause burning.
3. Flick Method:
With the tank removed, wrap a paper towel around the atomizer and flick your wrist sharply several times. The centrifugal force helps to expel the excess e-liquid. This method is genuinely useful for atomizers that are difficult to blow through.
4. Reducing E-Liquid Filling:
Ensure you're filling your tank correctly, avoiding overfilling, and warranting that e-liquid is just going into designated areas. Pay attention to your device's max fill line.
5. Checking the Coil and Wicking Material:
Make sure the coil is correctly positioned and the wicking material isn't excessively soaked. An old coil or an overly wet wick can result in inefficient e-liquid vaporization, causing the device to flood. Replace the coil or wick if necessary.
6. E-Liquid Viscosity:
Use an e-liquid with a viscosity appropriate for your device. High VG e-liquids are thicker and might not wick well in all devices, while high PG e-liquids are thinner and might flood coils in devices designed for thicker liquids.
7. Airflow Adjustment:
Experiment with your device's airflow settings. Increasing airflow can help clear out excess e-liquid, while too tight airflow might contribute to flooding by not allowing enough air to pass through the coil.
In conclusion, mastering "how to clean vape atomizer" is essential for any vape enthusiast looking to enjoy a consistently high-quality vaping experience. Regular maintenance not only prolongs the lifespan of your atomizer but also ensures that each puff delivers the rich, full-flavored vapor you cherish. Remember, a well-maintained vape is the key to unlocking the full potential of your vaping experience.